Thanks for visiting my blog! I hope to spark your imagination by sharing my creative endeavors with you! Please leave a comment! I love to hear from you! Come back often, you never know what you may find here! Happy Scrapping, Shellie
Saturday, March 20, 2010
CTMH True Fit Folio Accordian Album
I am in several scrapbooking groups online and in one group we are playing a game where you can earn points for completing different tasks. I've been working really hard to get the most points (I am in 2nd place right now). This weeks challenge was to make an Easter accordion album that had the following elements...
1. Is Stamped 2. Has Ribbon 3. Is Embossed
4. Is Distressed 5. Is Chalked 6. Is Painted
7. Has Eyelets 8. Has Brads 9. Has Clips
10. Has Pockets 11. Has Bling 12. Is Your work
When we got the challenge (in my group Queen of the Crop), I immediately thought of using the CTMH true fit folio as my base. I am so pleased with how it turned out! It forced me to use some elements that I might not have normally used, like paint, eyelets and chalk. I use these items, but not all the time. I really enjoyed using the paint with the CTMH distressing sponge to add dimension to my clouds! They look great!
If you would like to make your own folio accordion album you will need the following items... CTMH true fit folio, 12 pieces of printed paper cut 3 7/8" x 6", 5 pieces of cardstock cut 2 1/2" x 3 7/8", 5 pieces of cardstock cut 3 1/4" x 6", 24" of ribbon to tie the book closed, 1 1" x 6" piece of patterned paper to cover the opposite side of the tab, brads, buttons, stickles, ink, chalk, stamps and whatever else you want to use to embellish your album.
Tools used: paper cutter, scoring tool, coluzzle knife and mat and oval template, liquid glass or another liquid glue
Directions:
1.) With the folder closed and the crease at the bottom and the folder tab at the top, score at 6". I used a stylus to score it so that the paper would not tear.
2.) Turn the folder sideways so that folded side of the folder and the tab are to the left. Score at 4" and then at 8"
3.) Open the folder and fold along the 6" score line. Then fold along each 4" score mark. Re-fold each fold in the opposite direction, to make it easier to fold the folder from any direction.
4.) Open the folder and lay it flat with the folder tab in the upper left hand corner. This is front and back of your book. Glue your 12 pieces of patterned paper (3 7/8" x 6") inside each of the previously scored boxes. Be sure to glue them in between the mountains and valleys created by the folds, so that it bends easily when completed.
**when gluing the paper to the tabbed section, be sure to put the adhesive on the folder and not the paper. Otherwise the extra paper will get glued to your work surface**
5.) Trim off any excess paper around the tab
6.) Get your coluzzle, and turn your folder so that the tabbed section is on the bottom. You will be cutting a semi-oval about 1 1/4" deep in 5 of the 6 sections next to the tab. Line up the outside oval with the edges of each section. Cut the second line in on the template. Repeat with the other 4 remaining squares (DO NOT cut a semi-oval in the tabbed section)
7.) Turn your folder over, still opened and flat. The folder should be all white now. Glue the 2" x 3 7/8" pieces of patterned paper along the top of the five sections opposite the side with the semi-ovals cut out. Glue down the 1" x 6" piece of paper to the tab and trim it.
8.) Using chalk or an ink pad, distress the white edges between each section and around the edges of your album.
9.) Now you can embellish the inside of your book. The inside of your book will be the top row of your folder with the tab in your upper left hand corner. This is also the side where your semi-circles have been cut out.
10.) Once you have embellished your book, you are ready to glue it together and make it a BOOK! Using liquid glass or another liquid adhesive, place a sparse amount of glue along each of the 4" scored seams and all over the back of the tabbed section. Fold your book up along the 6" score, pressing each of the 4" scored lines to ensure a good bond. You will also need to place a sparse line along the edge of the last square of your book, to form the pocket. Let your book dry.
11.) While your book is drying, decorate the 5 cardstock tags for journaling or pictures.
12.) Now you can finish off your book by accordion folding it back and forth, starting with the front page. It may pucker a bit, but that is normal. Once you have it all folded, crease each edge again and manipulate the book in areas that may not be folding together "just right." Work the folds back and forth a bit so that they will move easier.
13.) Attach a ribbon around the closed book making sure that it ties to the right or tabbed part of the book.
Salish Lodge, Snoqualamie Falls, WA
DH and I decided to get away from it all, and went towards Seattle on Thursday Night so that we would be that much closer to my appointments on Friday. We were alone, no kids, no TV, just us...and the breathtaking view of Snoqualamie Falls from our destination Salish Lodge, where we stayed, alone, without any kids (or did I already say that?). We had a wonderful, marvelous, relaxing time. My only regret is that we could only stay one night. It is quite expensive, but well worth it (once in a blue moon). If you can't stay the night, at least park and walk over to see Snoqualamie Falls. It is gorgeous! Take a peek at our little vacation by watching my video...
Pirates Plunder!!!
Avast ye maties! We went to Seattle yesterday, for 2 doctor appointments! It was a gorgeous day, sunny, warm and flowers blooming everywhere! In between my appointments we ate down on the Waterfront at Red Robin, with a view of the bay. We parked 3 blocks away (parking is awful, especially on beautiful days). As we were walking towards the car my dh asked, "What was that neat shop that we used to go to that had all sorts of weird stuff in it?" "Oh, ye old curiosity shop?" I asked. It appeared to have disappeared, but in it's place we found this incredible new shop called Pirates Plunder Imports! I thought I had died and gone to Heaven, being a Pirate Princess myself! It was absolutely fantastic and it had all things pirate and then some! I hope you enjoy your little visit to this shop as much as I did. If you can't make it to Seattle, check them out online at www.piratesplunder.com
Friday, March 19, 2010
Reuse/Recycle a clip it up system
I have wanted to try the clip it up system, but can't afford it. I found some of the clips at Craft Warehouse and bought them on clearance, but they don't sell them anymore. I took some ribbon, and strung it underneath one of my shelves in my scrapbook room. Then I hung up some embellishmnents on it using the clips I bought. Of course, stuff was too heavy to put on the ribbon, and I ran out of clips. I bought colored clothespins at the Dollar Tree and planned on separating my items by color...red metal, blue rhinestones, green rub ons...and so on. Until.....
We were coming home from Spokane last weekend and stopped in Quincy to meet my friend Chris. She had the cutest house and the most wonderful family! She shared her scraproom with me that was in her garage. It was awesome and very organized (not like my space with stuff all over the floor), On one of her walls she had made her own version of the clip it up system, out of a wooden shelf, a length of all thread, washers and paperclips and closthespins! It was awesome! The picture above, is of her system. I was so excited that I came home and found 2 shelves at the Goodwill for $2.99 each! DH has the all thread, nuts and washers that he will bring home. Then he can drill holes in the end of each side of the shelves to hold the all thread. DH told me tonight that he carries all thread that will come out of the wall and can be as long as 6 feet! So I could put up a LOT of stuff (if I can find a place to put that). So, I will go to the dollar tree an stock up on colored paperclips to separate my categories and then put my system together! I'll post new pics later, once we are done!
To make your own system here is what you need to do....
Materials: shelf,acrylic paint (if desired), drill, pliers, mini clothespins, paperclips, 2 nuts, length of all thread (a round metal cylinder with threading along the entire length of it)
Instructions:
1. Paint your shelf to match your scrapbook room decor (or leave it the color it is)
2. Drill a hole in each end of the shelf, about 2 inches below the shelf itself
3. Open up all of the paperclips you will use, so that they are shaped like an S
4. Place one end of the paperclip through the eye of the washer and then twist the end back around, securing it to the paperclip. You should have a washer secured by the paperclip, with the lower portion of the paperclip still open.
5. Take the open end of the paperclip and hook it underneath the wire spring of the clothespin. Use your pliers to twist the open end around to secure it back to the other end of the paperclip.
6. Repeat steps 4-5 until you have as many clip it ups as you want
7. Put one end of the all thread through one of the holes you drilled earlier and secure it in place with a nut
8. Slip the washers over the all thread, until all of them have been put on (or you run out of room).
9. Put the other end of the all thread though the other drilled hole and secure that with another nut.
10. Hang up your shelf and then hang your embellishments on each paperclip. Enjoy!
Happy St. Patty's Day from me and my Shadow
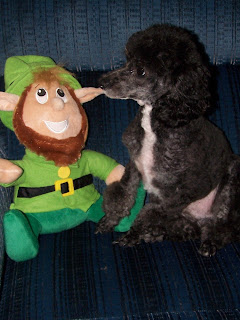
Top O' the Morning to ya! Today, my Shadow, my puppy, got his first "poodle cut" at the dog parlor. Isn't he cute? We call him Shadow because he is black and he follows me everywhere. Even when I go downstairs and have to stop because I'm so tired, he stops right behind me and waits for me. I just adore him! He is the best dog EVER! I say that because it is true, he is gentle, kind, a good listener and quite the gentleman. Even when I scrapbook, he jumps up and lays right behind me (which makes it hard for me to work). He is so good with the kids too. They can pick him up, dress him up, carry him around, and he just them. So have a wonderful day from me and my shadow! May you find a pot of gold at the end of your rainbow today! Hugs, Shellie
Tuesday, March 16, 2010
Studio J by Close TO My Heart
Jeanette Lynton, the founder of Close to My Heart has just created the most wonderful digital scrapbooking program called Studio J. Do you do any digital scrapbooking? Would you like to learn?
Digital Scrapbooking is a way to scrapbook using your computer. You do not need glue, embellishments, paper or any other consumable materials. Everything is done on the computer, from uploading your pictures, to uploading different papers and embellishments. Studio J gives you everything you need in one convenient location, http://www.studioj.com/ If you like CTMH papers and embellishments, you will LOVE Studio J. Your favorite papers, designs, inks and fonts are at your disposal. You can even distress your papers! I was really surprised at how easy it was to create a layout using Studio J. I was very impressed when I received my first sample layout for studio J, the paper your layout is printed on is thick, archivel and it looks 3-D with the virtual embellishments you add, and the coloring is fabulous! You can find studio J at your favorite consultants website. You can creste your layout and when you purchase it, CTMH will print it and send you your 12x12 two-page layout for $12.95 You will also recieve 5 memory sheet protectors for every 5-9 layouts you want printed AND you will recieve Free Shipping AND 5 memory sheet protectors for every 10-20 layouts you order (5 sheet protectors per 5 layouts). You do not need a special printer! CTMH will print them and send them to you in a timely manner as soon as you purchase your layout. Simple, fun, easy...just the way Close To My Heart provides for every scrapbooker! Try it out today!
If you are interested in seeing Studio J in person, please consider coming to a class that I am offering...the first class will be Friday, March 26 at 7:00. The next class will be 1:00 p.m. Saturday, March 27. Sign up soon, space is limited. Cost is $10 (that's $2.95 less than if you do studio J layout on your own - what a bargain)! You will receive one complete 2-page 12x12 layout and have a wonderful time scrapbooking, making new friends and learning something new! Contact me at ssauve7@aol.com for more details. I look forward to hearing from you!
Subscribe to:
Posts (Atom)