Thanks for visiting my blog! I hope to spark your imagination by sharing my creative endeavors with you! Please leave a comment! I love to hear from you! Come back often, you never know what you may find here! Happy Scrapping, Shellie
Sunday, July 25, 2010
ABC of Techniques P is for Penny Roll
Penny Roll
Supplies:
two pennies
one small round pop dot
scissors
word opening punch (long oval)
stamps
ink
ruler
foam mounting tape
pencil
Directions:1.) Design your layout
2.) Cut. stamp. create the layout
3.) Sketch a line (straight or wavy) where you want your image to roll
examples: a butterfly over a row of flowers
a single snowflake amidst a flurry of snowflakes
a surfer or boat across the ocean
a bird or kite across the sky
4.) Cut the area you want the image to roll through: it should be about 1/4" wide
**the word opening punch (long oval)is the perfect width
**a wavy opening is really fun to see, but a bit more difficult to cut out, a sharp exacto knife does the trick
**if you are making several pages of the same image, you should make one and then use it as a pattern for the rest of your pages
5.) Stamp two of the same images that you want to roll through your design
6.) Cut the images out
7.) Place one of the cut images face down on your desk
8.) Glue a penny to the back of the image
9.) Place a small round pop dot in the center of that penny
10.) Glue the other penny to the backside of the second image you cut out
11.) Let the glue holding the pennies dry for a few minutes
12.) Remove the backing from the pop dot already adhered to the back of one penny
13.) Place the second image onto that pop dot...penny side down, image facing up
****you should have a pop dot sandwich: image/penny/pop dot/penny/image
(at least one of the images should have the image facing out, so that the image can be seen)
14.) Put the penny sandwich into the opening you created earlier
****one penny should be behind the paper, the pop dot should be in the middle and the other penny should be on the front side of the paper - image facing up
15.) Turn your paper over and put foam tape around the perimeter
16.) Place another piece of cardstock behind your creation (the foam tape will keep the two pieces of cardstock from touching and allow your penny image to roll easily)
17.) Tilt your page left and right and watch your image spin as it rolls back and forth
Wednesday, July 07, 2010
B is for Beautiful Batik & Embossed Resist Techniques
I have used the batik technique before, with mulberry paper. This time I used cardstock and was very impressed with the result. It resembles a watercolor, but with clear, sharp images of your favorite stamps embedded amongst the colors for a very dramatic and beautiful effect. Please try this technique on your own and share your own creations and comments with me! I love comments!
Beautiful Batik Technique
Supplies:
Iron
Misting Water Bottle
Plain paper (to cover your project) - copy paper works well
Ink Pads
Sponges (one per color of ink)
Versamark ink pad
Embossing buddy
Stamps
Heat gun
Clear Embossing Powder
Instructions:
The first part of creating the Batik look, is to create an embossed resist
To Create an Embossed Resist you need to...
1.) Cover your paper with the embossing buddy
2.) Stamp your image(s) into the versamark ink and then onto your paper
3.) Sprinkle clear embossing powder over your inked images
4.) Use the heat gun to set the clear embossed image(s)
5.) Use your sponge(s) to add color over your paper (the clear embossed images will resist the ink leaving the embossed areas the color of your paper)
That is how to create a resisted image onto your paper. This looks amazing itself! To create the Batik Looking project you need to take the emboss resisted paper and then continue with the following steps....
Batik Technique: Follow the steps 1-5 as described above
6.) Using your mini mister, spray water all over your paper (this will make the colors bleed a little into each other)
7.) Cover your misted paper with another piece of paper (copy paper or another thin paper works best)
8.) Iron over your paper. You will begin to see the embossed image appear onto the cover paper. You are finished ironing when you can easily pull the cover paper off of your design. If the paper does not come off easily, iron a little more. The iron melts the embossed area, leaving the design completely flat and dull.
9.) Embellish your paper and enjoy!
Tuesday, July 06, 2010
F is for Faux Leather Technique
I just learned this technique and absolutely love it! It is so simple, and it looks so real! It makes wonderful purses and I'm sure it would make equally impressive shoes, clothes and other accessories too. I hope you enjoy it as much as I do, please share your own creations and comments! I love comments!
Supplies Needed
Textured Paper
Versamark Ink
Embossing Buddy
Clear Embossing Powder
Bone Folder
Heat Gun
Instructions
1.) Rub over your paper with the embossing buddy
2.) Rub Versamark pad all over your paper
3.) Cover your paper with the clear embossing powder
4.) Carefully rub the powder into the paper without rubbing the powder off
5.) Use the bone folder to score lines into the paper
6.) Tap off any excess embossing powder
7.) Use the heat gun to melt the embossing powder
8.) Embellish your design
Wednesday, April 21, 2010
Stickle Storage
As soon as I used stickles the first time, I knew they were fabulous! I loved the way it sparkled, and added another dimension to my projects. I started to colect them, and I used them on almost every project. I put them in a little box for awhile, but soon I had too many for the box. One afternoon I was surfing ebay for stickles and I found this really cool stickle storage holder that someone had made. It was shaped kinda like an octogon, and there were holes drilled into the top of it to hold the stickles. The stickles were to be stored upside down, so that they would always be ready to use. I loved it, bid on it and WON! The seller even asked me what colors I wanted and she painted it pink with blue polka dots. It was wonderful! I put this organizer on top of my Close To My Heart ink and marker turnaround so that I could grab the color I wanted to use easily. It worked great, and I was in a group that did buy-ins and on one of the buy ins they did stickles and I got a whole bunch more, including the new ones from Tim Holtz and Suze Weinberg! I couldn't fit all of them into my stickle holder, and tried to think of another way to store them, upside down, to keep them easily ready to use.
I found a cardboard box with a hinged lid, and I started to put the bottles of stickles into it. Each bottle is about an inch wide, and I was able to fit 18 bottles in each row. I didn't have enough to fill the entire box, so I added some crumpled paper towels to help hold them into place, and then taped up a piece of styrofoam and put it over the top of the bottles (at this point they were sitting upright in the box) and closed the lid. I turned the entire box upside down so that the stickles could drain towards the lid of each bottle. I opened it back up after a while and checked on them, a few of them had moved, but for the most part it worked really well and I could easily store over 70+ bottles in this one box.
I decorated the outside of the box with some colored paper and then I covered the paper with clear tape to reinforce the box and keep it strong.
Tuesday, April 20, 2010
Handmade Clip-It Up System
I was so thrilled to see the comments left about my ribbon organization, especially about the rain gutters! When I was teaching, I used the rain gutters to store children's books, and loved it, so now that I'm on disability (because of my foot) I just recycled them for my ribbon. I love to reuse stuff in new ways!
A few years ago, the Clip It Up system came out, which was a round, three-tiered rotating embellishment organizer. The idea was to clip up your embellishments and make them easier to access. It looked really cool, but it was soooo expensive! I never got one. My embellishments seem to be multiplying like rabbits and I am finding that Out of Sight is NEVER USED, at my house. So I was desperate to find a way to display some of my embellishments, so that I could see them, but also keep them out of the way.
One afternoon I was at Craft Warehouse and I saw the clip it up clips on clearance! I bought a bag to try them out. I did NOT have the clip it up organizer and I was stumped about how to use them. I thought and thought and finally decided to hang a ribbon under one of my shelves and hang the clips off of that. It worked! I could see and access my embellishments so easily! Unfortunately there were drawbacks to my creation....
1.) I had more embellishments than clips
2.) The embellishments were heavier than the ribbon and the ribbon started to sag.
3.) Craft Warehouse had sold out of the clips, so I couldn't get anymore
What to do? I left it as it was for a while, and thought and thought some more. One afternoon, I went to meet a friend of mine from one of my online scrapbooking groups. I went to see her scrapbooking room and found a solution to my problem! My clever friend had bought a wall shelf about 2 feet wide and her husband had drilled a hole in each end underneath the shelf and bolted an all-thread wire through it. She used paperclips and metal washers to create hooks where she hung up her embellishments. Immediately my mind started reeling and I took a picture and then hollered at my husband to come and see what my friend had made. I am very blessed to have a husband who can make and/or fix ANYTHING!
He looked at the system and said he could easily make one for me.
The next day I went to the Goodwill to look for a shelf. I am a NINJA SHOPPER according to my kids, and I found not one, but TWO shelves for a total of $3.95!! I was so excited, I called my husband to tell him the good news. He praised my frugal shopping and then told me that he found something at his work that he was going to rig up to hold my all-thread and embellishments. He is very creative when making stuff to help me out, so I knew it would be awesome. I couldn't let the shelves go to waste, so I put them up on the wall and put some of my Disney toys on them. My scrapboom is decorated with Disney toys which keeps it kid and scrapbooker friendly! I have 5 kids + 1 more who is living with us right now and so I need things as kid friendly as possible!
Later that week my wonderful husband came home with this stand-up frame that had 3 rows of the all thread on it! WOW! It was incredible! It also had room to add at least one more strip of the all-thread! I was so excited that I started working on adding my embellishments to it!
My friend had shown me how to take pliers and open up the paperclip, hang the washer on the paperclip and then wind it around itself using the pliers to hold it together. Then she took a mini clothespin and wound the other end of the paperclip around the threading on the paperclip. Then she slid the washer onto the all-thread and clipped her embellishment on the clothespin. Time consuming, but incredible! I am so blessed to have such clever family and friends!
I started to open up paperclips and hook the washers on them. It was a lot of work and if the paperclip was old, it would break, which started to make me frustrated. I found that by opening up the paperclip slightly, I could slide the washer onto it without opening the paperclip completely. This saved me a lot of time and frustration! I didn't have mini clothespins, but I did have the clip it up clips, so I just hung the clips onto the closed paperclip and WALLAH, I had my own clip it up hangar! It didn't take long to run out of the clips, so I started looking around for something else to use. I found those plastic clips that you use to hold reports and other thick documents together. I had a bunch, so I tried them...without much effort I slid each clip onto the other end of the paperclip! I slid the washers onto the all-thread and hung my embellishments on them! I LOVE IT! My wonderful husband is going to add some wheels to the bottom of it so that I can wheel it around which will make it even more perfect! I can see my embellishments a lot easier and am using them more frequently now! Another organizational idea discovered and implemented!
Please leave me a comment (I love comments), and let me know what you think about this idea~ Thanks for stopping by and come back soon! You never know what you might discover! Have a scrappy day!
Thanks for coming to the BLOG HOP!!
WOW! The blog hop was fantastic! I LOVED all the comments! Keep 'em coming! I will be choosing one commenter on April 30th, to receive new ribbon!
I have to apologize to Ramona because I couldn't get her link to upload to my blog yesterday. So sorry Ramona. I did add it to my Ribbon Organization Blog Post and here it is again.....http://create-with-joy.blogspot.com
Be sure to check it out! Thanks to all the participants in the Blog Hop too! So much new information! Off to keep organizing! I went to a fabulous scrap retreat April 8 and my Scraproom is still a mess! I have had trouble with my left big toe for 5 years and yesterday my doc said that my bone is collapsing again! So I HAVE TO clean up, or I could break it! Have a scrappy day! Come back again soon, you never know what you might find!
Monday, April 19, 2010
Organizational Blog Hop!! TODAY!
Hi and welcome to the organizational blog hop! I am so excited that you took the time to stop by and see how I have organized my ribbons and fibers. Please take a minute and leave me a comment so that I know you stopped by. I am going to send some new ribbon to one of the reader's drawn at random, on April 30, 2010 from one of the comments left between now and then on my section of the blog hop. If you would like to check out some other SCRAPTASTIC ideas for organizing your scrapbooking supplies, please hop to the all of the other blogs and be sure to leave a comment for them too!
Organizational Blog Hop April 19, 2010
Photograph Storage by Leanne - http://scrappingamma.blogspot.com/
Embellishment Storage by Jo - http://buckeyejo.blogspot.com/
YOU ARE HERE!! Ribbon & Fiber Storage by Shellie: http://clearlythemostcreativescrapbookers.blogspot.com/
Stamp Storage by Wendy - http://www.myscrapbookingblog.com/
Ink Pad Storage by Ramona - http://create-with-joy.blogspot.com
Pen & Pencil Storage by Jeanne Marie - http://missjeannemania.blogspot.com/
Sticker, Die Cuts and Rub-On Storage by Amanda - http://notimecrafting.wordpress.com/
Tools Storage and Paper Storage by Mary - http://mbryt1.blogspot.com/
------------------------------------------------------------------------------------------------------
Ribbon and Fiber Storage
When I began scapbooking I was very limited on money and supplies (hey, I'm still limited on money and supplies) and stickers were my main embellishments. Slowly my embellishments grew the more I scrapped and the more I became involved in Close To My Heart, card making, and scrapbooking. I bought those tiny ribbon rolls first and then moved on to the bigger rolls as my skills grew. I joined the Personal Scrapper and went to some card workshops and slowly I started accumulating several different random varying lenghts of ribbon. I just stuck them into a ziploc bag. Soon my ribbon scraps outgrew the bag and I started to put them in a huge glass jar. It looks pretty, with all the ribbon swirling around the glass like a delicious lollipop! The ribbons and fibers mingled and soon tangled and it was very frustrating to find that Just Right piece of ribbon. My arm was swallowed up by the rainbow of ribbon when I began a new project. I had to do something, so I took one of the free priority mail boxes from the post office and I started to cut. I cut dozens and dozen of little cardboard strips about 2" x 3". Before long I was surrounded by a thin brown sea of cardboard. I called my girls up to help me start the daunting task of organizing that rainbow! We sat for a few hours, pulling one ribbon from the jar at a time and winding it around it's placard. Finally I took each ribbon, sorted them according to their color and placed them into clear shoe boxes from the Dollar Tree. Now I could clearly see each color and easily match it to the project I was working on. I grew frustrated with this whenever I would reach for the ribbon box and go to pull out a ribbon, several others would tag along and I was constantly straightening up my boxes.
Take Two on Ribbon and Fiber Organization....
One day I was at Craft Warehouse and I found some 3x3 plastic ribbon organizers. These were 3x3 pieces of plastic that you could wind your ribbon around on them. Ok, but that is what I was already doing with cardboard, so that wasn't much progress. Then, my sister, who has tons and tons and oodles upon oodles of scrapping embellishments, told be about her idea to use the 3x3 cards, cut them in half and then cut slits in each side to hold several ribbons at once. Sounds great! Unfortunately I am a very visual learner and I could not for the life of me, figure7e out what she was talking about. Then I went over to her house and saw what she meant. That helped a lot! She has an entire wall of ribbon and has each roll carefully placed on rows upon rows of dowels. She then showed me her ribbon scraps, beautifully organized onto the plastic, now 1 1/2" x 3" piece of ribbon card. She cut the ribbon csrd in half along the zig zagged line that runs up the middle of the card. Next she cut lines on each side of the card diagonally opposite each other, to hold each individual piece of ribbon. Finally she punched a hole into the top of each card so that she could put them together on a hinged ring! Genius! So I went to work making my own ribbon cards. I cut 4 slits in my cards whereas my sister only cut 3. Personal preference. Once my ribbons were put onto the cards, I slid each card onto a hinged ring, according to colors. I have 3 rings right now, full of varying lengths of ribbon. Recently I went to a crop and I took a paper towel tube and punched out six holes (3 on each side of the tube). I took my rings off of my storage unit and slid them onto the paper towel tube and took them to the crop! At the crop I noticed other people had taken those pants hangars and slid their ribbons onto the hangars and then hung them up on the wall. Super Cool!!!
I still use my other methods too...as much as I love the card method, it does not work well with fibers,they snag too much. I still organize my fibers on the cardboard according to color.
I keep a much smaller ribbon jar on top of my desk and when I finish with my ribbon, if I have some leftover, I put it in the jar and then once a week I hang the loose ribbons onto my hanging ribbon cards.
I store my little ribbon spools in a Close To My Heart Ribbon Organizer. My medium ribbon spools are kept on a spice rack that I found at the Goodwill and painted to match my scraproom. I store my larger ribbon spools on a rain gutter! It is awesome! We bought a small section of a plastic rain gutter and I put it on my shelf. It holds the spools and you can easily pull the ribbon off of the spool because the gutter is wide enough to let the spool turn around so you can pull off as much as you need.
Well, that's how I store my ribbons and fibers (sorry there is not too much on fibers, I don't use them very much). Thanks for taking the time to stop by my blog! Be sure to leave a comment so that you can have a chance to win some new ribbons from me! Please leave your contact information so that I can contact you if you win! Have a scrappy day and come back soon!
Saturday, April 17, 2010
Time to Blog Hop!!!
I am so excited!!! Monday, April 19th I am participating in my very first Blog Hop! What is a blog hop? It is when a group of bloggers get together and each one chooses a theme or scheme to blog about. When you visit her blog, you will get new and exciting information and then a list of the rest of the blogs in the hop. You can take as little or as much time as you want hopping around from blog to blog on the list. By the time you finish the hop you will have plethora of new information!
My first blog hop is on organization of scrapbook supplies. My part is on organizing ribbons and fibers. I am really excited to see how the other gals creatively organize their materials. The blog hop on April 19th will include, paper storage, paint storage, ribbon and fiber storage, embellishment storage and many more. Please come back on Monday to check out how I organize my ribbons and fibers and then hop on through the list to find other creative ideas. If you stop by before Monday, please leave a comment so that I know you were here! I love to hear from you guys! Have you ever participated in a blog hop as a blogger OR as a reader? Come back soon for more ideas! Thanks for stopping by and have a scrappy day!
Saturday, March 20, 2010
CTMH True Fit Folio Accordian Album
I am in several scrapbooking groups online and in one group we are playing a game where you can earn points for completing different tasks. I've been working really hard to get the most points (I am in 2nd place right now). This weeks challenge was to make an Easter accordion album that had the following elements...
1. Is Stamped 2. Has Ribbon 3. Is Embossed
4. Is Distressed 5. Is Chalked 6. Is Painted
7. Has Eyelets 8. Has Brads 9. Has Clips
10. Has Pockets 11. Has Bling 12. Is Your work
When we got the challenge (in my group Queen of the Crop), I immediately thought of using the CTMH true fit folio as my base. I am so pleased with how it turned out! It forced me to use some elements that I might not have normally used, like paint, eyelets and chalk. I use these items, but not all the time. I really enjoyed using the paint with the CTMH distressing sponge to add dimension to my clouds! They look great!
If you would like to make your own folio accordion album you will need the following items... CTMH true fit folio, 12 pieces of printed paper cut 3 7/8" x 6", 5 pieces of cardstock cut 2 1/2" x 3 7/8", 5 pieces of cardstock cut 3 1/4" x 6", 24" of ribbon to tie the book closed, 1 1" x 6" piece of patterned paper to cover the opposite side of the tab, brads, buttons, stickles, ink, chalk, stamps and whatever else you want to use to embellish your album.
Tools used: paper cutter, scoring tool, coluzzle knife and mat and oval template, liquid glass or another liquid glue
Directions:
1.) With the folder closed and the crease at the bottom and the folder tab at the top, score at 6". I used a stylus to score it so that the paper would not tear.
2.) Turn the folder sideways so that folded side of the folder and the tab are to the left. Score at 4" and then at 8"
3.) Open the folder and fold along the 6" score line. Then fold along each 4" score mark. Re-fold each fold in the opposite direction, to make it easier to fold the folder from any direction.
4.) Open the folder and lay it flat with the folder tab in the upper left hand corner. This is front and back of your book. Glue your 12 pieces of patterned paper (3 7/8" x 6") inside each of the previously scored boxes. Be sure to glue them in between the mountains and valleys created by the folds, so that it bends easily when completed.
**when gluing the paper to the tabbed section, be sure to put the adhesive on the folder and not the paper. Otherwise the extra paper will get glued to your work surface**
5.) Trim off any excess paper around the tab
6.) Get your coluzzle, and turn your folder so that the tabbed section is on the bottom. You will be cutting a semi-oval about 1 1/4" deep in 5 of the 6 sections next to the tab. Line up the outside oval with the edges of each section. Cut the second line in on the template. Repeat with the other 4 remaining squares (DO NOT cut a semi-oval in the tabbed section)
7.) Turn your folder over, still opened and flat. The folder should be all white now. Glue the 2" x 3 7/8" pieces of patterned paper along the top of the five sections opposite the side with the semi-ovals cut out. Glue down the 1" x 6" piece of paper to the tab and trim it.
8.) Using chalk or an ink pad, distress the white edges between each section and around the edges of your album.
9.) Now you can embellish the inside of your book. The inside of your book will be the top row of your folder with the tab in your upper left hand corner. This is also the side where your semi-circles have been cut out.
10.) Once you have embellished your book, you are ready to glue it together and make it a BOOK! Using liquid glass or another liquid adhesive, place a sparse amount of glue along each of the 4" scored seams and all over the back of the tabbed section. Fold your book up along the 6" score, pressing each of the 4" scored lines to ensure a good bond. You will also need to place a sparse line along the edge of the last square of your book, to form the pocket. Let your book dry.
11.) While your book is drying, decorate the 5 cardstock tags for journaling or pictures.
12.) Now you can finish off your book by accordion folding it back and forth, starting with the front page. It may pucker a bit, but that is normal. Once you have it all folded, crease each edge again and manipulate the book in areas that may not be folding together "just right." Work the folds back and forth a bit so that they will move easier.
13.) Attach a ribbon around the closed book making sure that it ties to the right or tabbed part of the book.
Salish Lodge, Snoqualamie Falls, WA
DH and I decided to get away from it all, and went towards Seattle on Thursday Night so that we would be that much closer to my appointments on Friday. We were alone, no kids, no TV, just us...and the breathtaking view of Snoqualamie Falls from our destination Salish Lodge, where we stayed, alone, without any kids (or did I already say that?). We had a wonderful, marvelous, relaxing time. My only regret is that we could only stay one night. It is quite expensive, but well worth it (once in a blue moon). If you can't stay the night, at least park and walk over to see Snoqualamie Falls. It is gorgeous! Take a peek at our little vacation by watching my video...
Pirates Plunder!!!
Avast ye maties! We went to Seattle yesterday, for 2 doctor appointments! It was a gorgeous day, sunny, warm and flowers blooming everywhere! In between my appointments we ate down on the Waterfront at Red Robin, with a view of the bay. We parked 3 blocks away (parking is awful, especially on beautiful days). As we were walking towards the car my dh asked, "What was that neat shop that we used to go to that had all sorts of weird stuff in it?" "Oh, ye old curiosity shop?" I asked. It appeared to have disappeared, but in it's place we found this incredible new shop called Pirates Plunder Imports! I thought I had died and gone to Heaven, being a Pirate Princess myself! It was absolutely fantastic and it had all things pirate and then some! I hope you enjoy your little visit to this shop as much as I did. If you can't make it to Seattle, check them out online at www.piratesplunder.com
Friday, March 19, 2010
Reuse/Recycle a clip it up system
I have wanted to try the clip it up system, but can't afford it. I found some of the clips at Craft Warehouse and bought them on clearance, but they don't sell them anymore. I took some ribbon, and strung it underneath one of my shelves in my scrapbook room. Then I hung up some embellishmnents on it using the clips I bought. Of course, stuff was too heavy to put on the ribbon, and I ran out of clips. I bought colored clothespins at the Dollar Tree and planned on separating my items by color...red metal, blue rhinestones, green rub ons...and so on. Until.....
We were coming home from Spokane last weekend and stopped in Quincy to meet my friend Chris. She had the cutest house and the most wonderful family! She shared her scraproom with me that was in her garage. It was awesome and very organized (not like my space with stuff all over the floor), On one of her walls she had made her own version of the clip it up system, out of a wooden shelf, a length of all thread, washers and paperclips and closthespins! It was awesome! The picture above, is of her system. I was so excited that I came home and found 2 shelves at the Goodwill for $2.99 each! DH has the all thread, nuts and washers that he will bring home. Then he can drill holes in the end of each side of the shelves to hold the all thread. DH told me tonight that he carries all thread that will come out of the wall and can be as long as 6 feet! So I could put up a LOT of stuff (if I can find a place to put that). So, I will go to the dollar tree an stock up on colored paperclips to separate my categories and then put my system together! I'll post new pics later, once we are done!
To make your own system here is what you need to do....
Materials: shelf,acrylic paint (if desired), drill, pliers, mini clothespins, paperclips, 2 nuts, length of all thread (a round metal cylinder with threading along the entire length of it)
Instructions:
1. Paint your shelf to match your scrapbook room decor (or leave it the color it is)
2. Drill a hole in each end of the shelf, about 2 inches below the shelf itself
3. Open up all of the paperclips you will use, so that they are shaped like an S
4. Place one end of the paperclip through the eye of the washer and then twist the end back around, securing it to the paperclip. You should have a washer secured by the paperclip, with the lower portion of the paperclip still open.
5. Take the open end of the paperclip and hook it underneath the wire spring of the clothespin. Use your pliers to twist the open end around to secure it back to the other end of the paperclip.
6. Repeat steps 4-5 until you have as many clip it ups as you want
7. Put one end of the all thread through one of the holes you drilled earlier and secure it in place with a nut
8. Slip the washers over the all thread, until all of them have been put on (or you run out of room).
9. Put the other end of the all thread though the other drilled hole and secure that with another nut.
10. Hang up your shelf and then hang your embellishments on each paperclip. Enjoy!
Happy St. Patty's Day from me and my Shadow
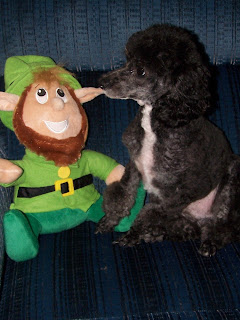
Top O' the Morning to ya! Today, my Shadow, my puppy, got his first "poodle cut" at the dog parlor. Isn't he cute? We call him Shadow because he is black and he follows me everywhere. Even when I go downstairs and have to stop because I'm so tired, he stops right behind me and waits for me. I just adore him! He is the best dog EVER! I say that because it is true, he is gentle, kind, a good listener and quite the gentleman. Even when I scrapbook, he jumps up and lays right behind me (which makes it hard for me to work). He is so good with the kids too. They can pick him up, dress him up, carry him around, and he just them. So have a wonderful day from me and my shadow! May you find a pot of gold at the end of your rainbow today! Hugs, Shellie
Tuesday, March 16, 2010
Studio J by Close TO My Heart
Jeanette Lynton, the founder of Close to My Heart has just created the most wonderful digital scrapbooking program called Studio J. Do you do any digital scrapbooking? Would you like to learn?
Digital Scrapbooking is a way to scrapbook using your computer. You do not need glue, embellishments, paper or any other consumable materials. Everything is done on the computer, from uploading your pictures, to uploading different papers and embellishments. Studio J gives you everything you need in one convenient location, http://www.studioj.com/ If you like CTMH papers and embellishments, you will LOVE Studio J. Your favorite papers, designs, inks and fonts are at your disposal. You can even distress your papers! I was really surprised at how easy it was to create a layout using Studio J. I was very impressed when I received my first sample layout for studio J, the paper your layout is printed on is thick, archivel and it looks 3-D with the virtual embellishments you add, and the coloring is fabulous! You can find studio J at your favorite consultants website. You can creste your layout and when you purchase it, CTMH will print it and send you your 12x12 two-page layout for $12.95 You will also recieve 5 memory sheet protectors for every 5-9 layouts you want printed AND you will recieve Free Shipping AND 5 memory sheet protectors for every 10-20 layouts you order (5 sheet protectors per 5 layouts). You do not need a special printer! CTMH will print them and send them to you in a timely manner as soon as you purchase your layout. Simple, fun, easy...just the way Close To My Heart provides for every scrapbooker! Try it out today!
If you are interested in seeing Studio J in person, please consider coming to a class that I am offering...the first class will be Friday, March 26 at 7:00. The next class will be 1:00 p.m. Saturday, March 27. Sign up soon, space is limited. Cost is $10 (that's $2.95 less than if you do studio J layout on your own - what a bargain)! You will receive one complete 2-page 12x12 layout and have a wonderful time scrapbooking, making new friends and learning something new! Contact me at ssauve7@aol.com for more details. I look forward to hearing from you!
Friday, March 12, 2010
Making Faces
I absolutely love to draw. I was blessed with a gift (I guess). If I can see it in my minds' eye, then I can make/draw/create it. Many people think that they absolutely CAN NOT DRAW! I'm here to tell you that is not true! You can make anything, using simple shapes, a pencil and an eraser. Today I will walk you through drawing a cute face. It is really pretty easy, so give it a try!
1) Draw 3 frowny smiles on your face - 2 beside each other and one a little below and between the 2 frowns you just drew.
2) Draw 2 more frowns...left to right and above the first 2 frowns you made (that are beside each other)(eyes) Then draw a sideways V coming out of the outside corner of each eye
3) Draw a V underneath the lower frown, connecting the left and right side of the frown(nose)
4) Draw a W underneath the nose, connecting it with the point of the V you just drew(mouth)
5) Draw a rectangle underneath the W, connecting the spots to the left and right of the middle
section of the mouth (teeth)
6) Draw an odd number of dots to the left and right of the nose (whiskers)
7) Color in the nose and draw a circle inside each eye and color those too
8) Take a white uniball gel pen, or some white paint and place one dot in each eye and a tiny line across the nose, to create dimension
9) Draw 2 more frowns above each eye for eyebrows
Wallah! A cute face! Follow the pictures for an easy tutorial. If this is difficult to understand, please let me know. I can just "do" stuff, but I have a hard time explaining how to do it, so I'm working on that skill now, with your help. Thanks for looking! Tell your friends about my blog and come back soon!
Wednesday, March 10, 2010
Making Easter Bunnies from Toilet Paper Tubes
I am in several online scrapbooking groups where we trade supplies and play some fun games. In one group we are playing a game called Easter Rak Splat. You create some fun containers and fill them with candy, ribbon, buttons, or whatever else you can think of and mail them to another member of the group. Yesterday I spent the afternoon making some bunnies out of empty toilet paper tubes (it's amazing how fast we go through a roll of toilet paper with 7-9 people here everyday). I also decorated some coffee cups to go, and altered a little tin. Fun, quick, easy and a great way to use up some scrap paper.
I got to thinking, you can make almost anything out of a toilet paper tube! I may work on some leprechauns today! Come back soon, to see what else I've made!
Sunday, February 28, 2010
Using Sketches
Some people love to use sketches and other people absolutely think they are taboo. I'm a middle of the road-er. I LOVE to create my own designs, around my photos, but sometimes I need some inspiration. I turn to sketches from other scrapbookers when I need that little boost. My favorite sketches are from Jeanette in the books she created for Close To My Heart. Her books (Reflections, Cherish and Imagine) are laid out according to the number of photos you can use. For example, if you have 3 photos, you can look in the front of the book for layouts that use 3 photos. Towards the back of the books, are sketches that use up to 15 photos! Of course, these are just sketches and you can take what you like and tweak them to make them YOUR OWN. You may use a photo spot for journaling or an embellishment, the possibilities are endless. I find that when I use a sketch, I can scrapbook a lot faster, and still use my creativity through the use of paper and other embellishments. I do not think that there is a right way or a wrong way to scrap or scraplift an idea from another scrapbooker (as long as you give proper credit to the original designer). We all take a little from here and there and add some of our own jeux ne seis quoix, to create our own masterpieces!
If you have never tried using a sketch, try it out, you might like it! Maybe by looking at a sketch it will spark some inspiration and you will design something completely different, with undertones of the original sketch from which you drew your inspiration. You can find sketches everywhere....magazines, scrapbooking companies (CTMH and Creative Memories), websites (scrapbookcardsandpapers, creating keepsakes). Maybe you already have a favorite place that you get sketches from. If you don't, start a list, and maybe even a journal to keep your sketches in for future reference. Sketches are springboards for creativity and I hope you find some inspiration from them.
I'm the owner/moderator of Disney PST, a piffing and snagging group, where scrappers who have a little more than they need of one thing can list it for another scrapper to snag it. Then the piffer can snag something surplus from another scrapper. It is a lot of fun! If you are interested in such a group, please let me know, ssauve7@aol.com (I have an "IN" with the owner - LOL). Anyway, one member, Tracy has become our inspirational source for the year. She has been listing one new sketch each month. I had a lot of fun creating new layouts with her sketches I can't wait to see what the next sketch will be. I will post her sketches and my layouts from the sketches here. Enjoy, and keep on scrapping!
Subscribe to:
Posts (Atom)